In Account Settings, you can upload a list of the required carrier codes (shipping codes) that are used by your fulfillment provider's WMS.
Note: For some Warehouse Management Systems, PackageBee will automatically load the default carrier codes for you. Otherwise, you should upload them manually. In either case, you can edit your carrier codes using the following steps.
Add or edit Carrier Codes
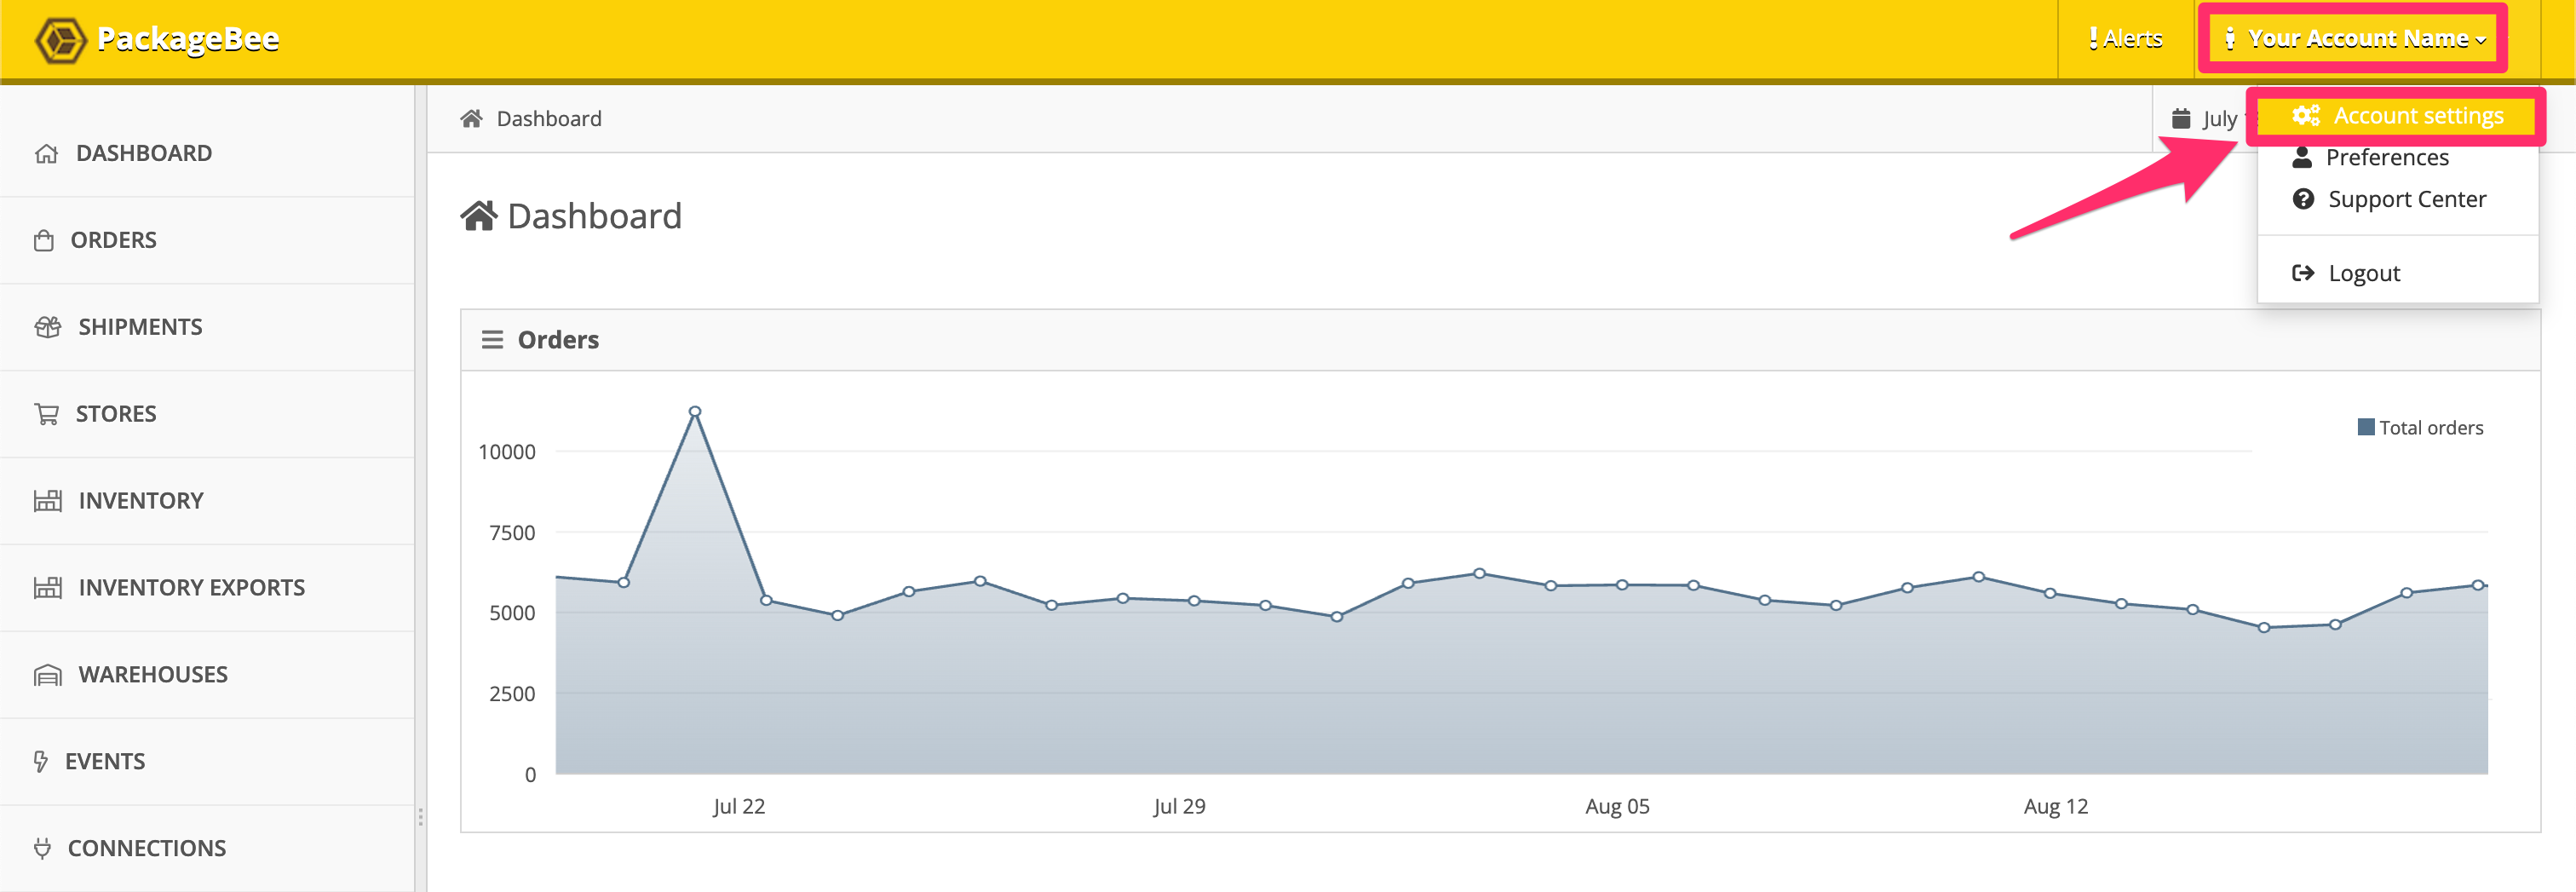
- In PackageBee Dashboard, click the Account Name, then Account settings.
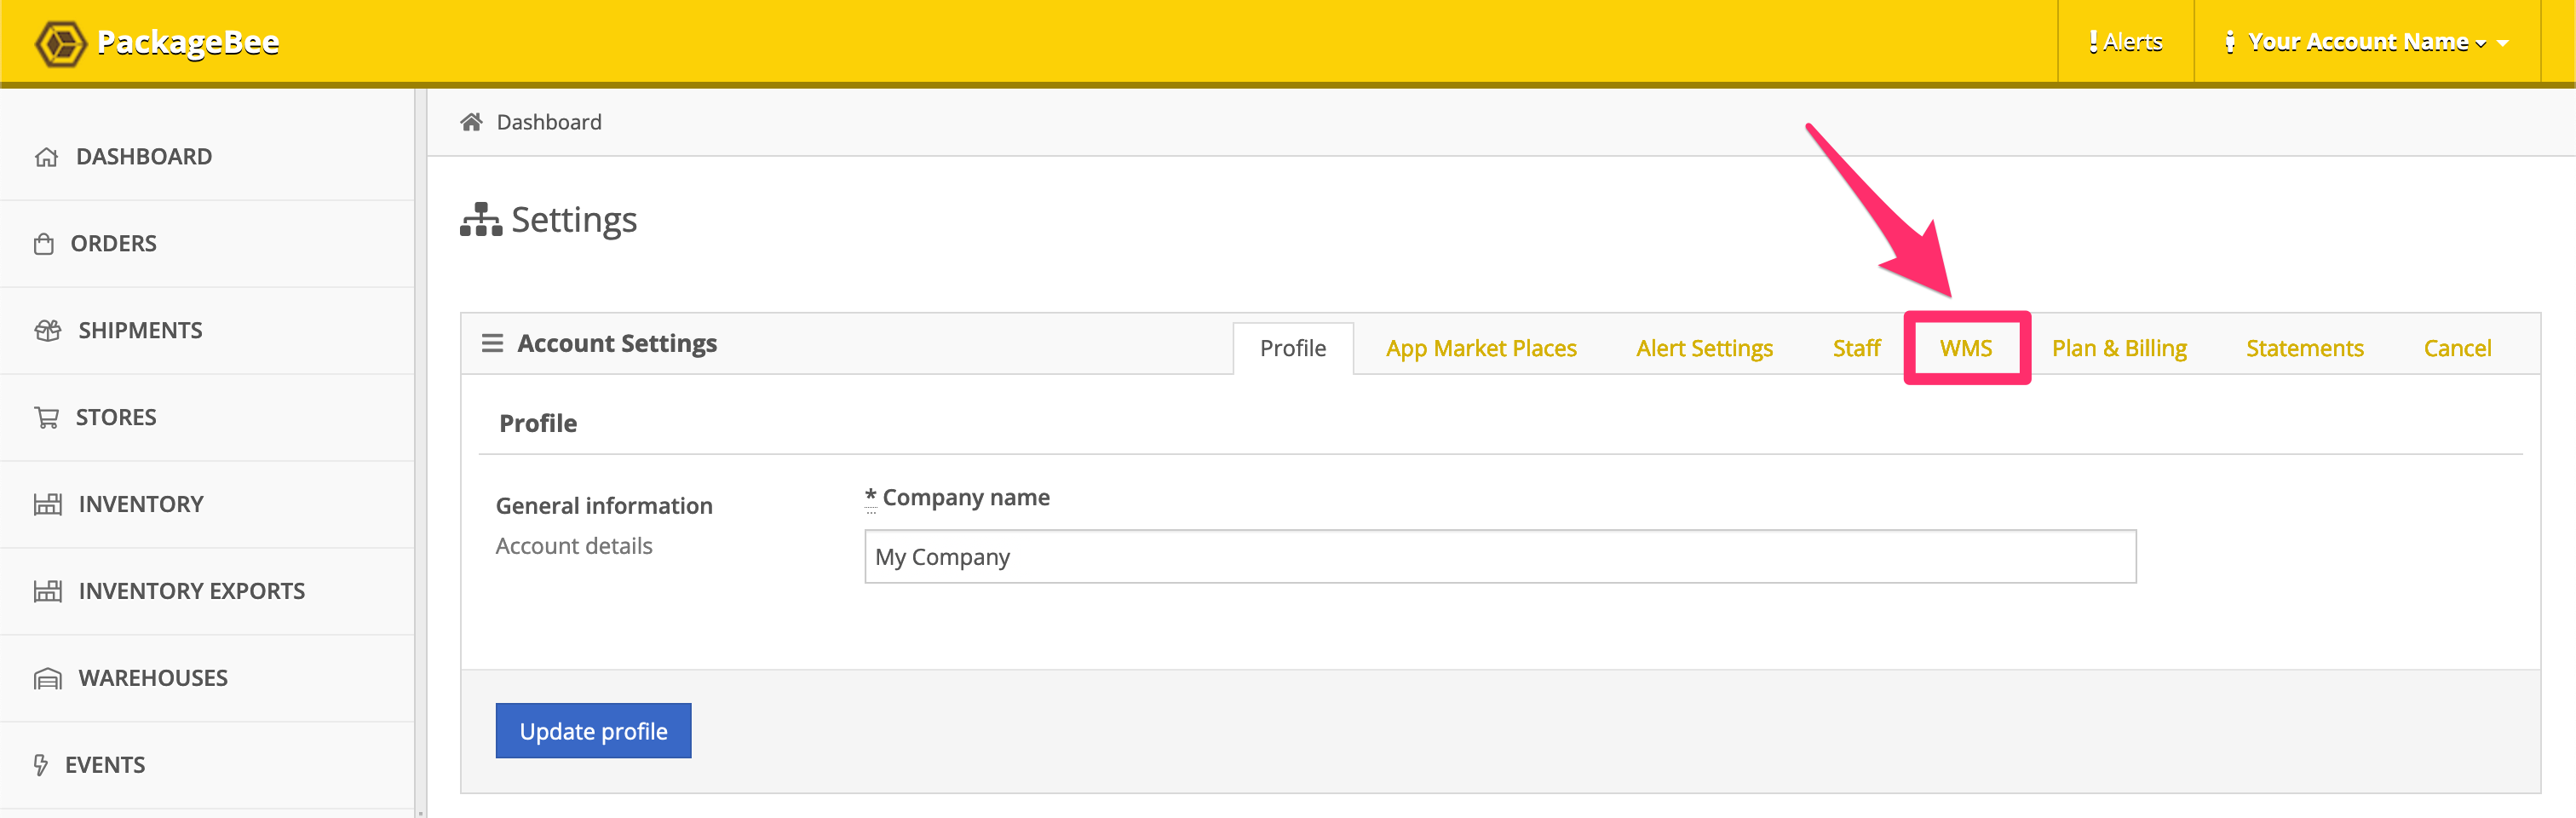
- Click the WMS tab.
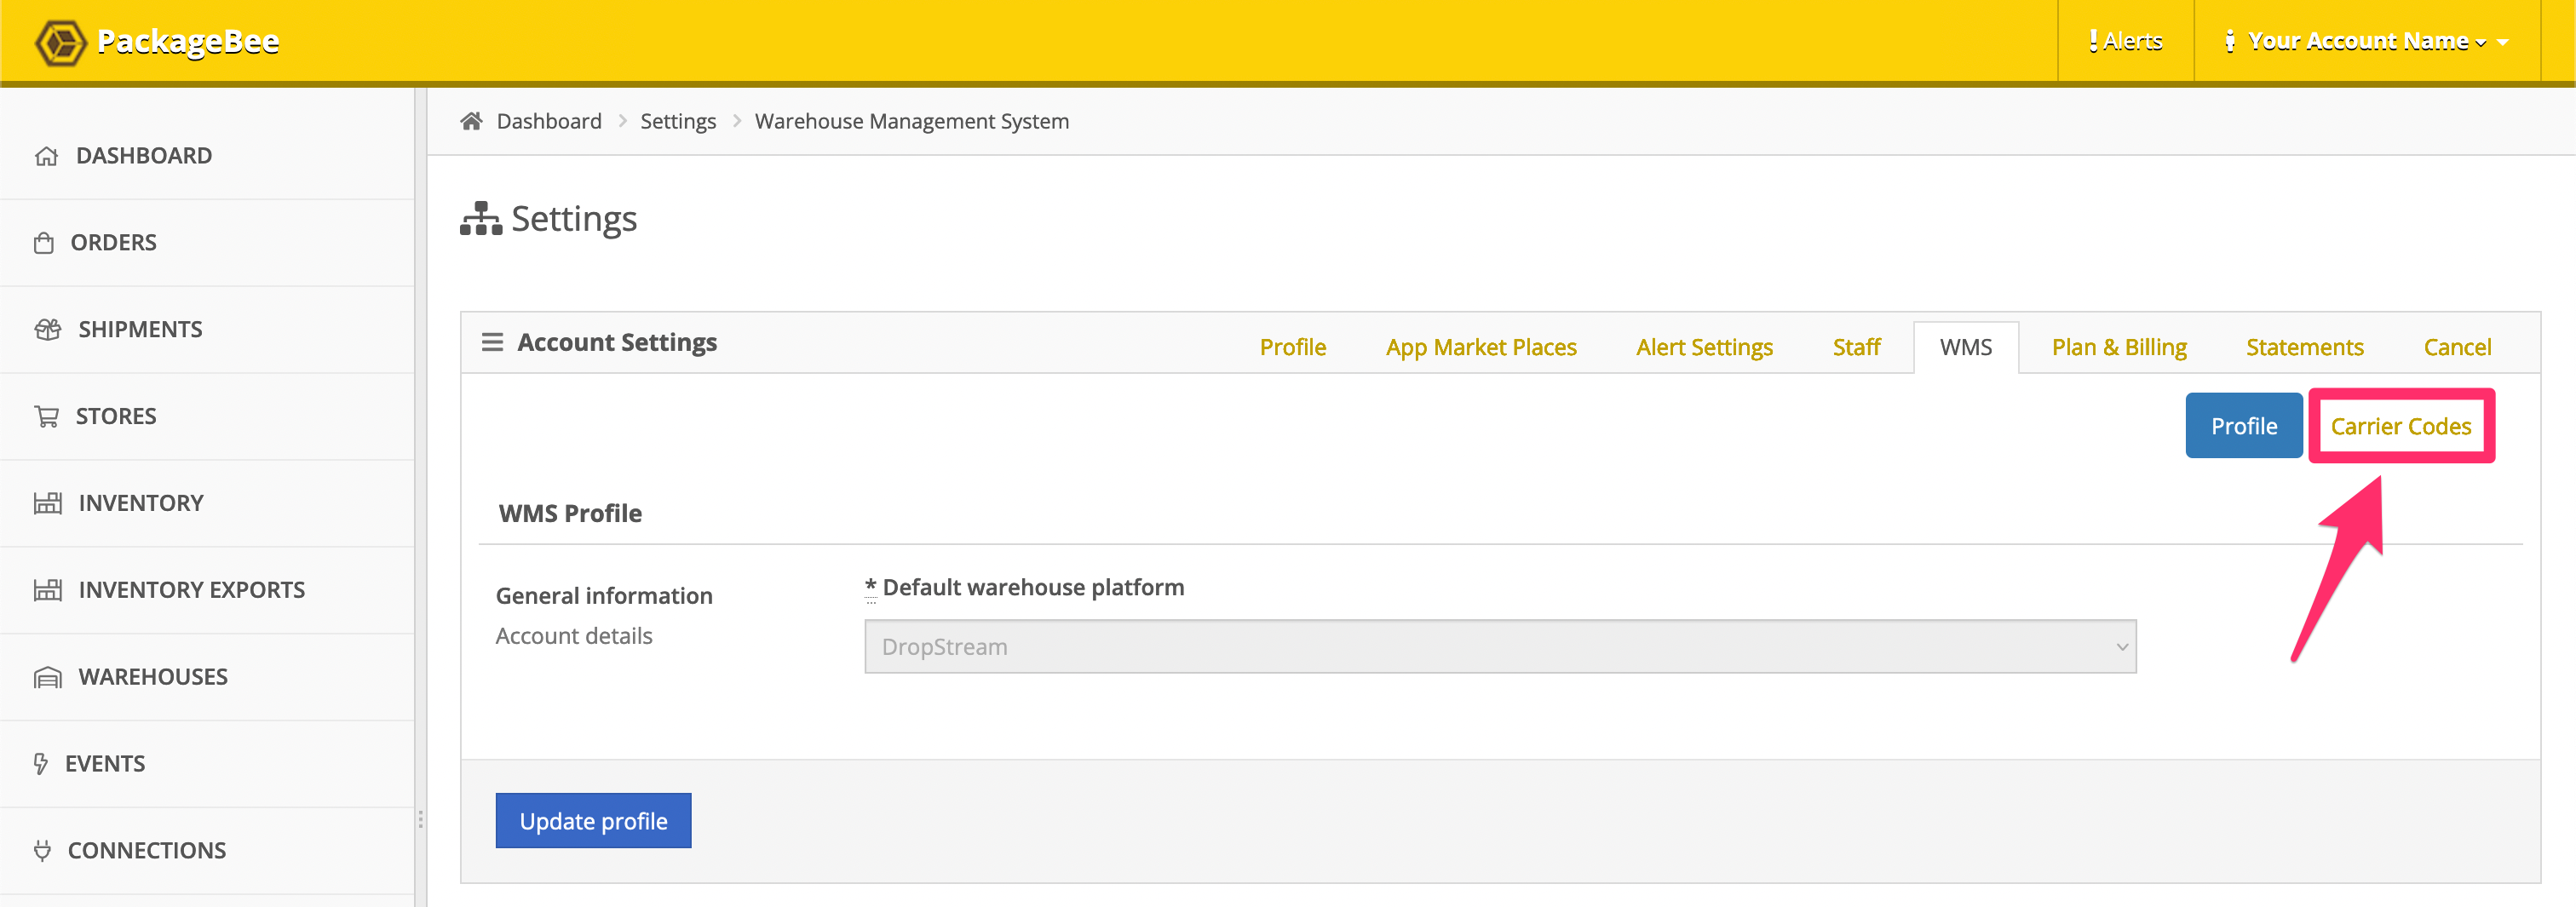
- Click Carrier Codes.
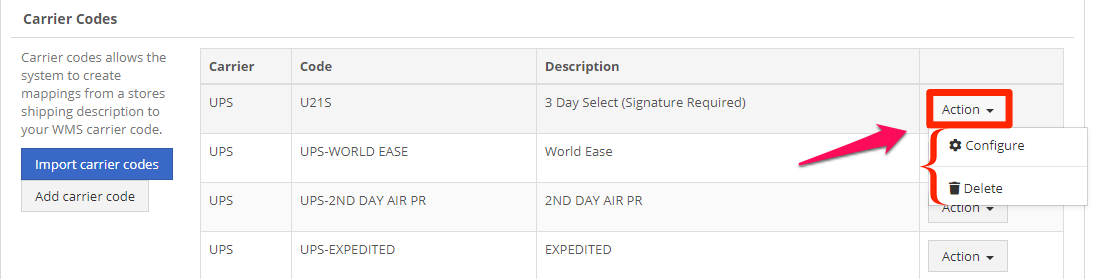
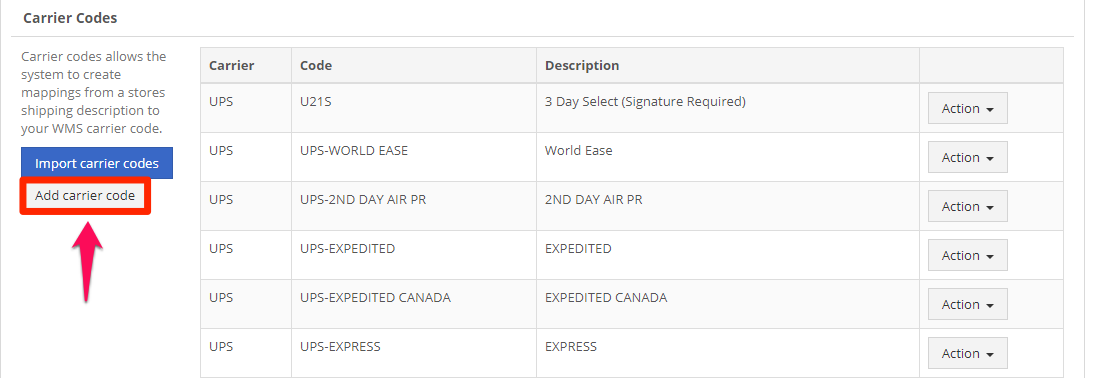
- Your current carrier codes are shown, along with their associated Carrier Name and Description:
- Carrier - the name of a postal carrier.
- Code - the carrier code taken from your WMS.
- Description - the description of the carrier code that explains what the code means.
- To edit or delete an existing carrier code, click Action next to the description of the code, and then select either Configure or Delete, respectively.
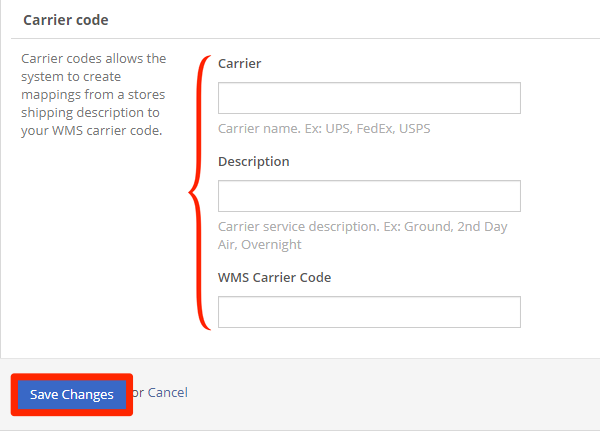
- To add new carrier codes one at a time, click Add carrier code.
- Then enter the values for carrier name, carrier code and code description, and click Save Changes.
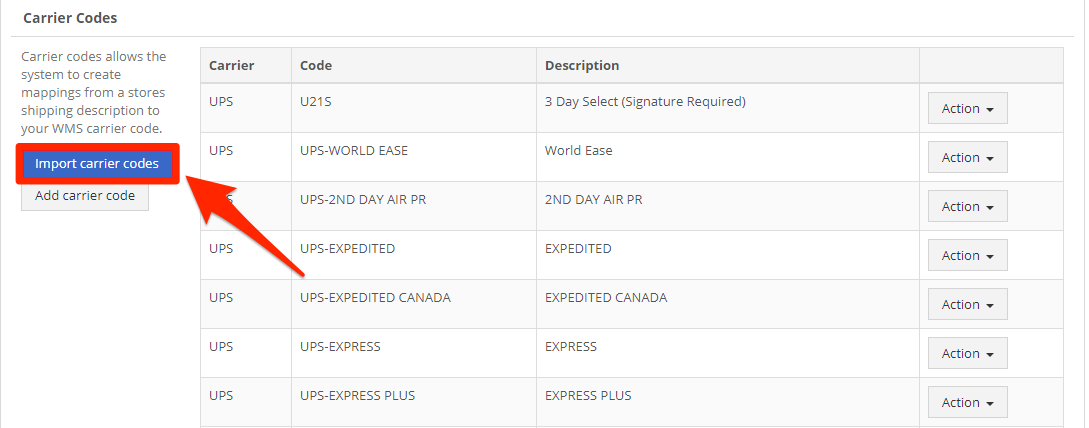
- To add carrier codes in bulk, create a .csv file with the fields (Carrier, Code, Description) then click Import carrier codes to upload the file.
- In the dropdown menu under your file name, you can choose to Ignore existing mapping codes (if values in your CSV would conflict with an existing code), or to Overwrite them with your new values.
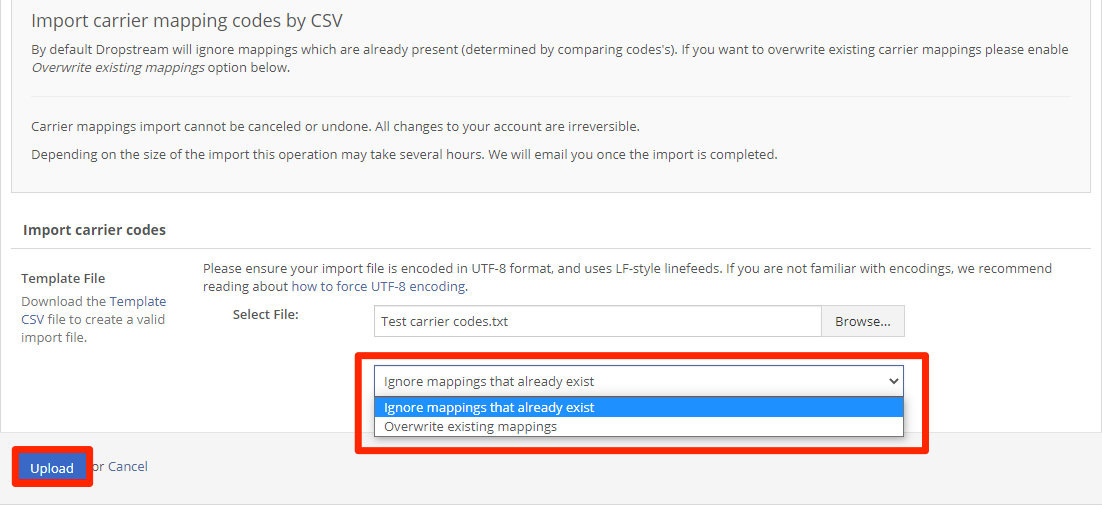
- Click Upload to submit your carrier codes to PackageBee.