To facilitate importing sales forms, follow these steps to configure a custom field in QuickBooks Online called Fulfillment. This field will be used by the integration to determine which forms to import.
Configure custom "Fulfillment" field in QBO
- Log in to QuickBooks Online.
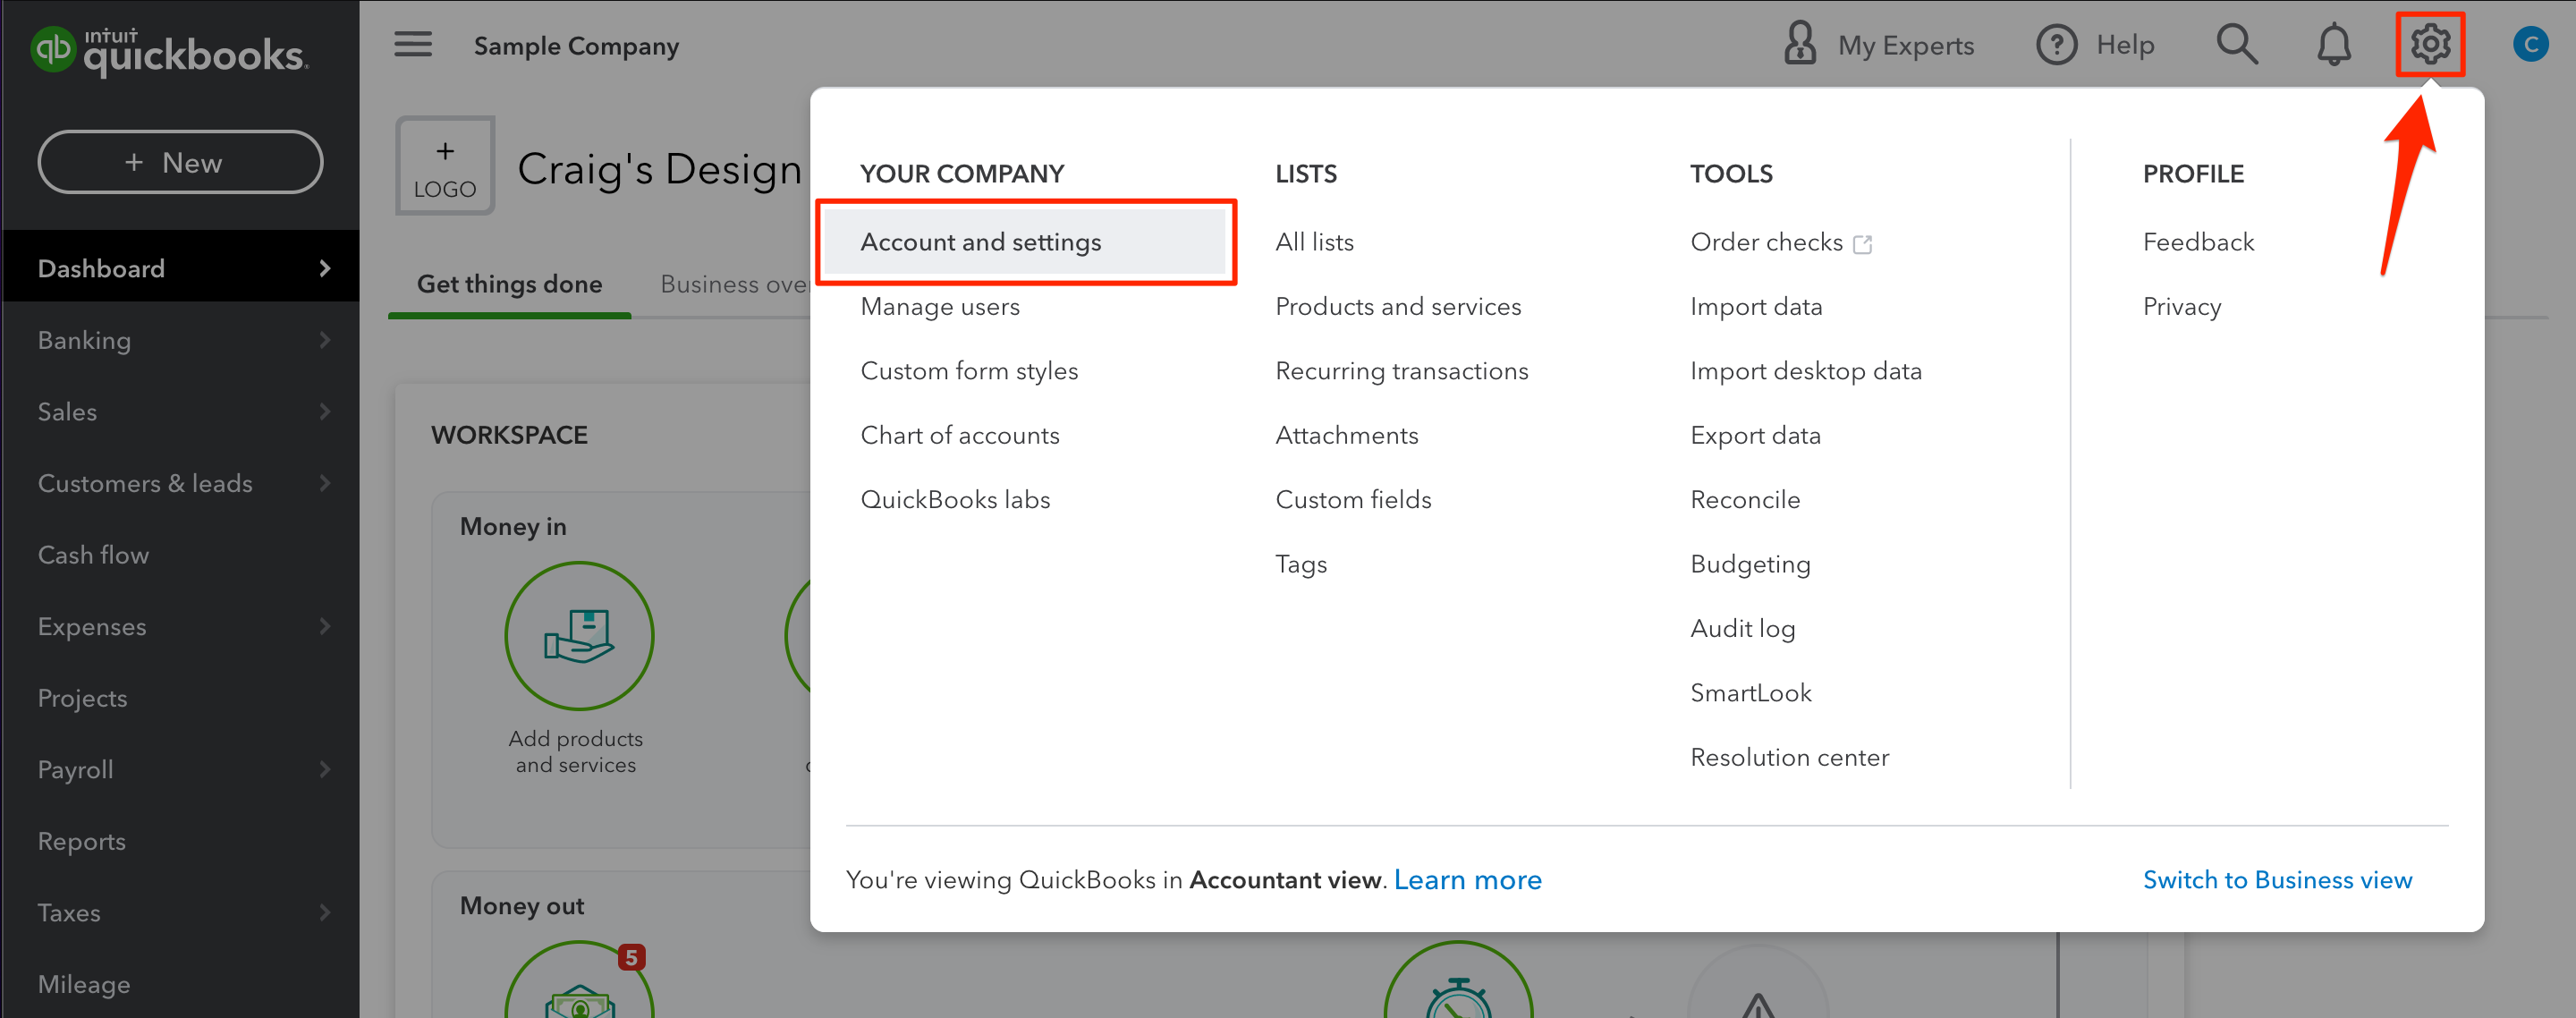
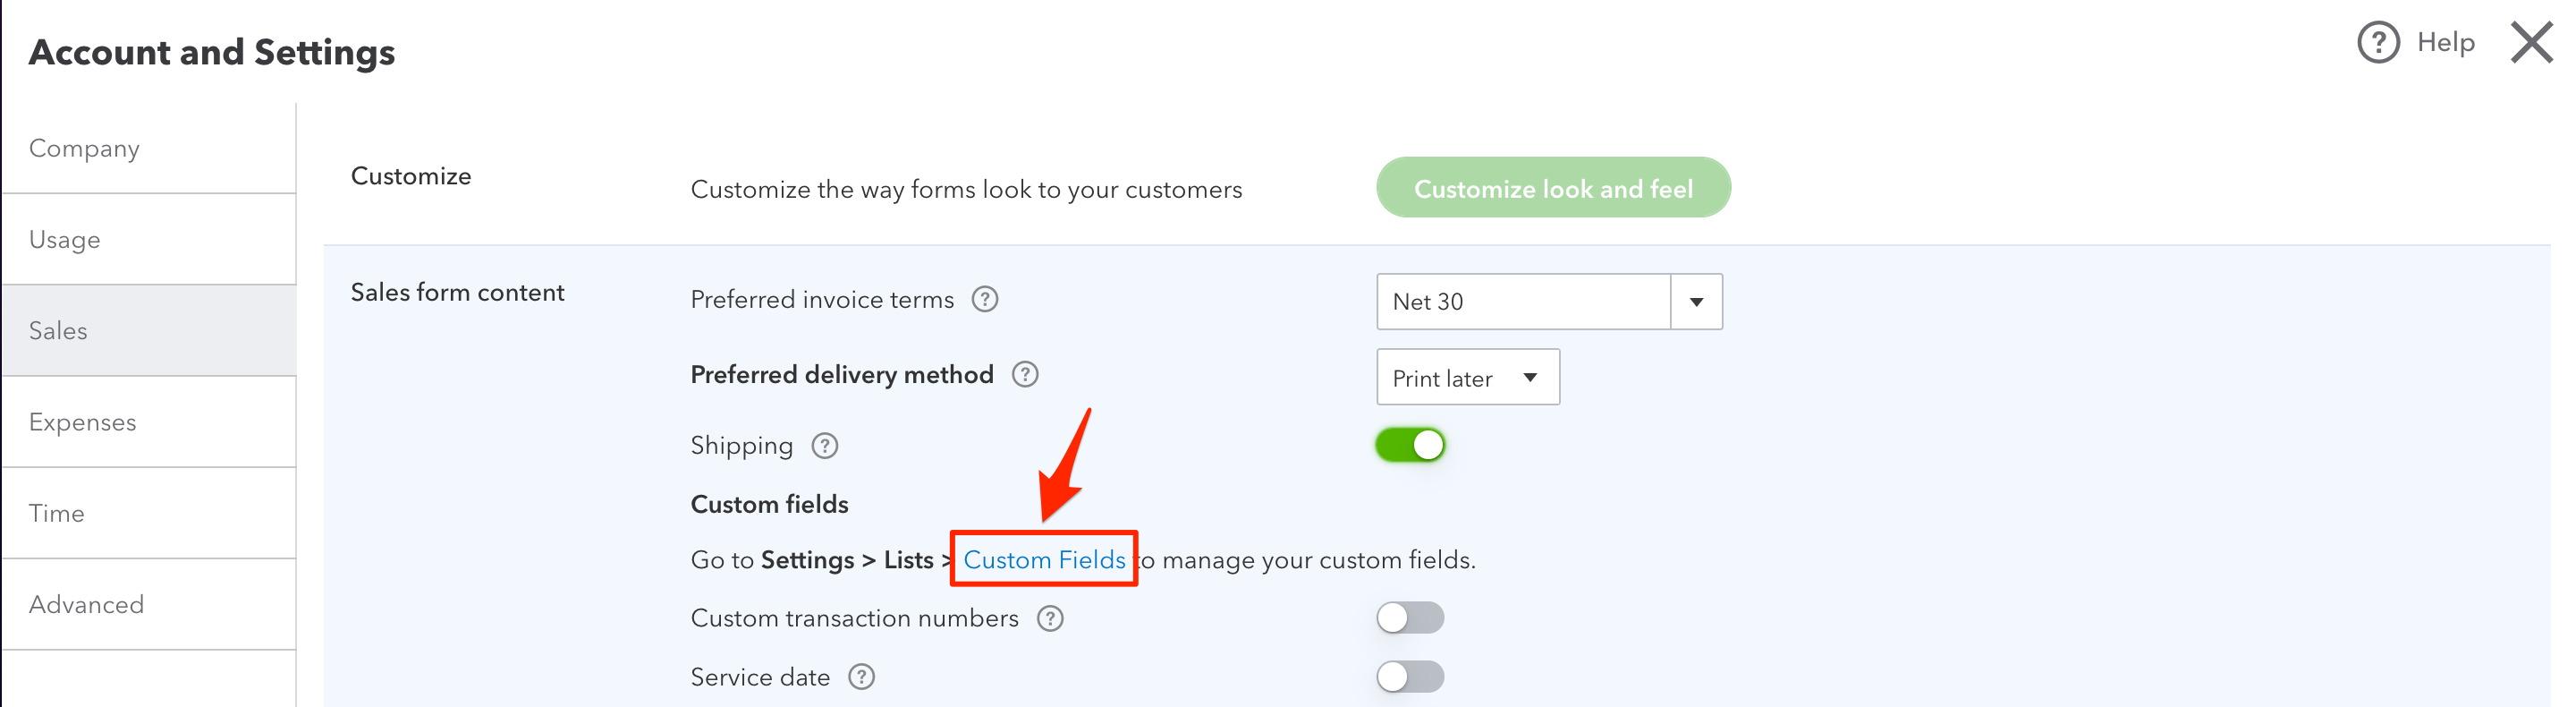
- In the upper-right of the dashboard, click the Settings gear icon , then click Account and settings.
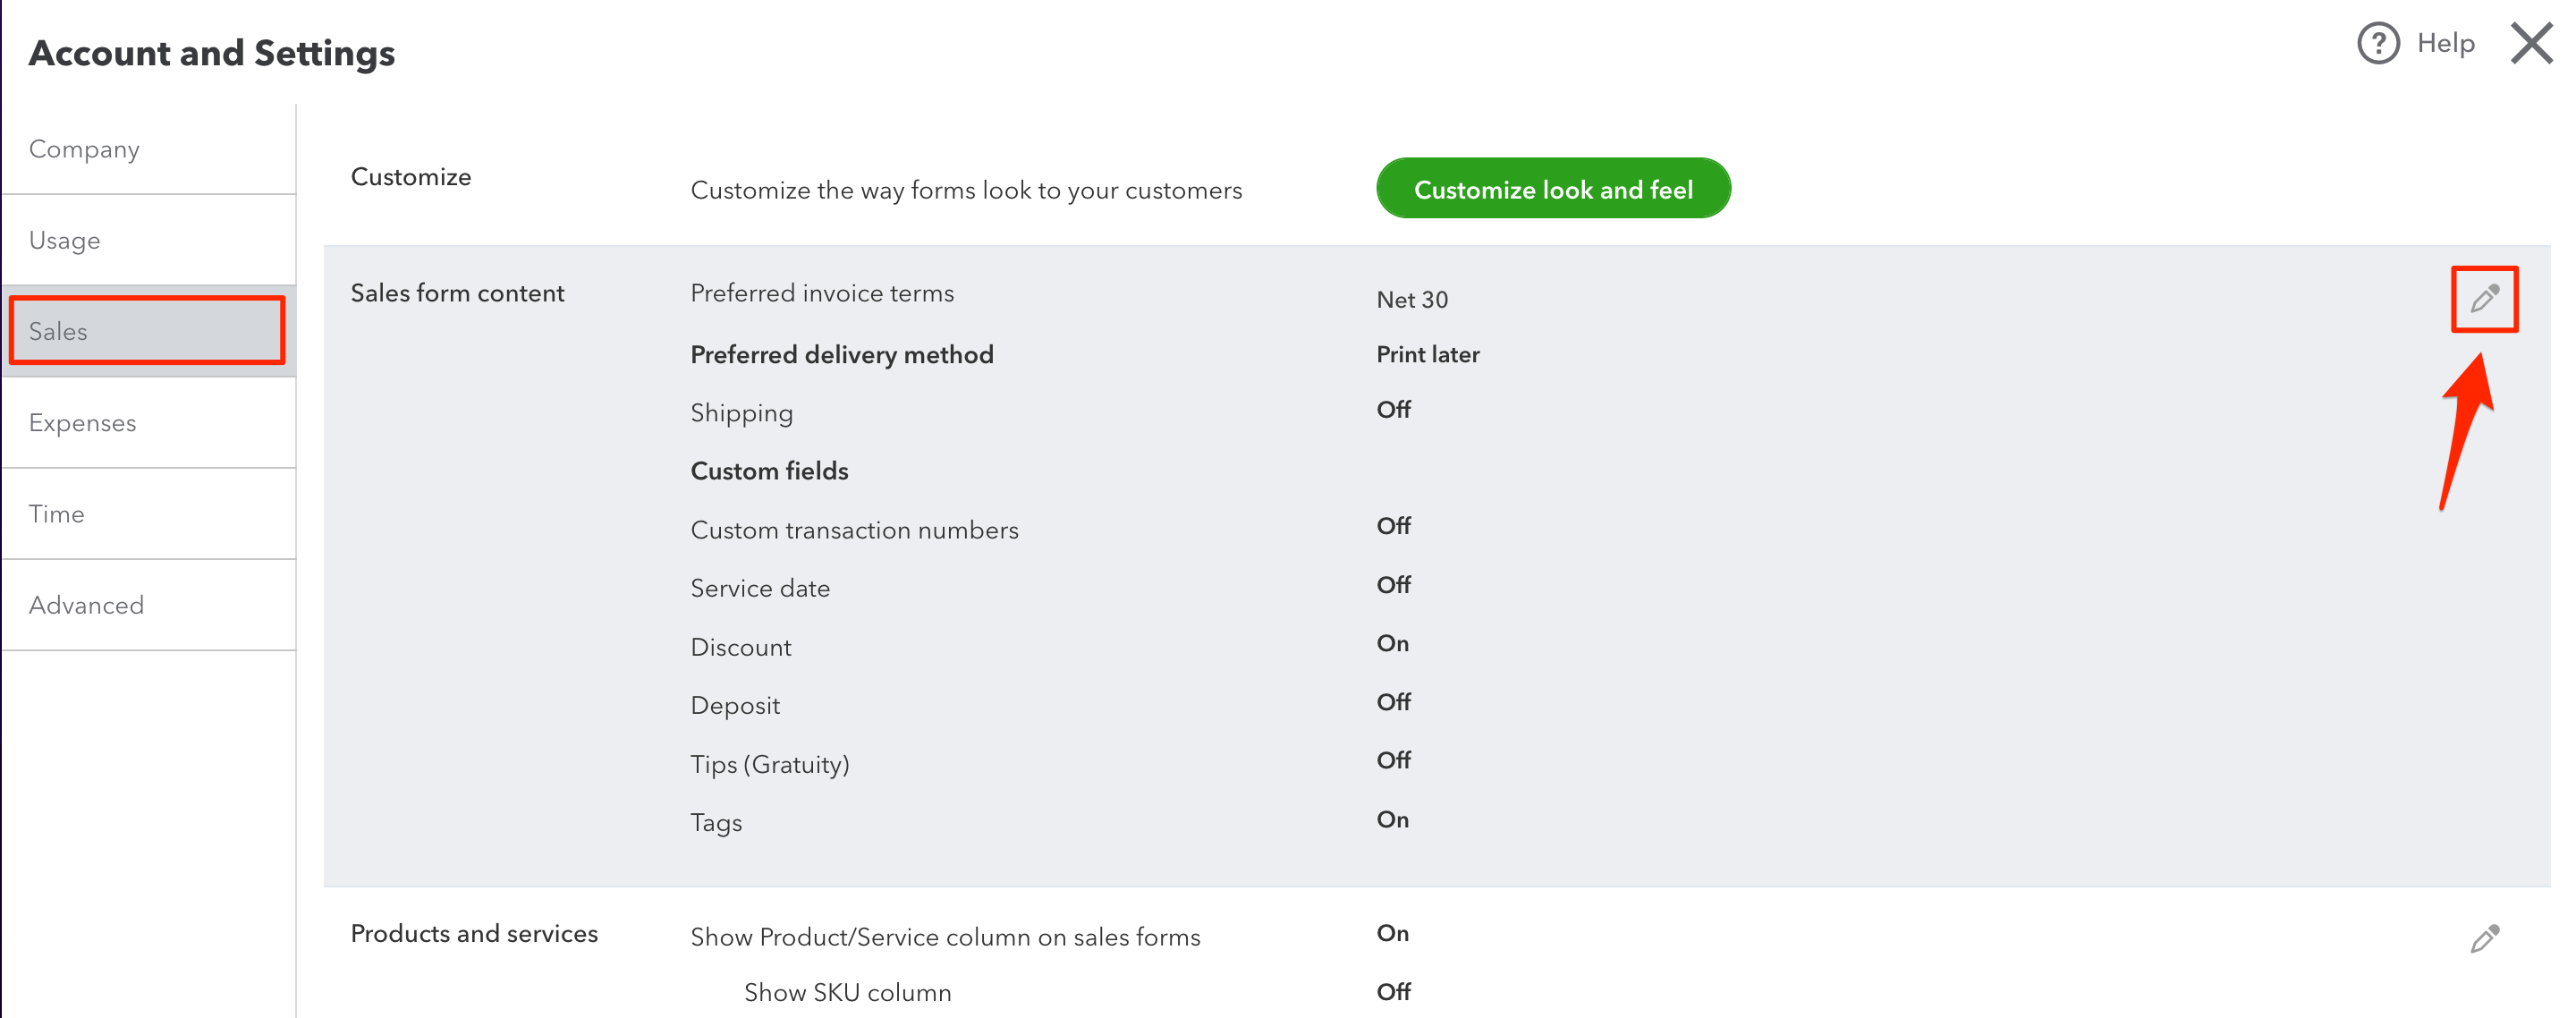
- In Account and settings, On the left, click Sales.
- In the Sales form content section, click the Edit pencil icon .
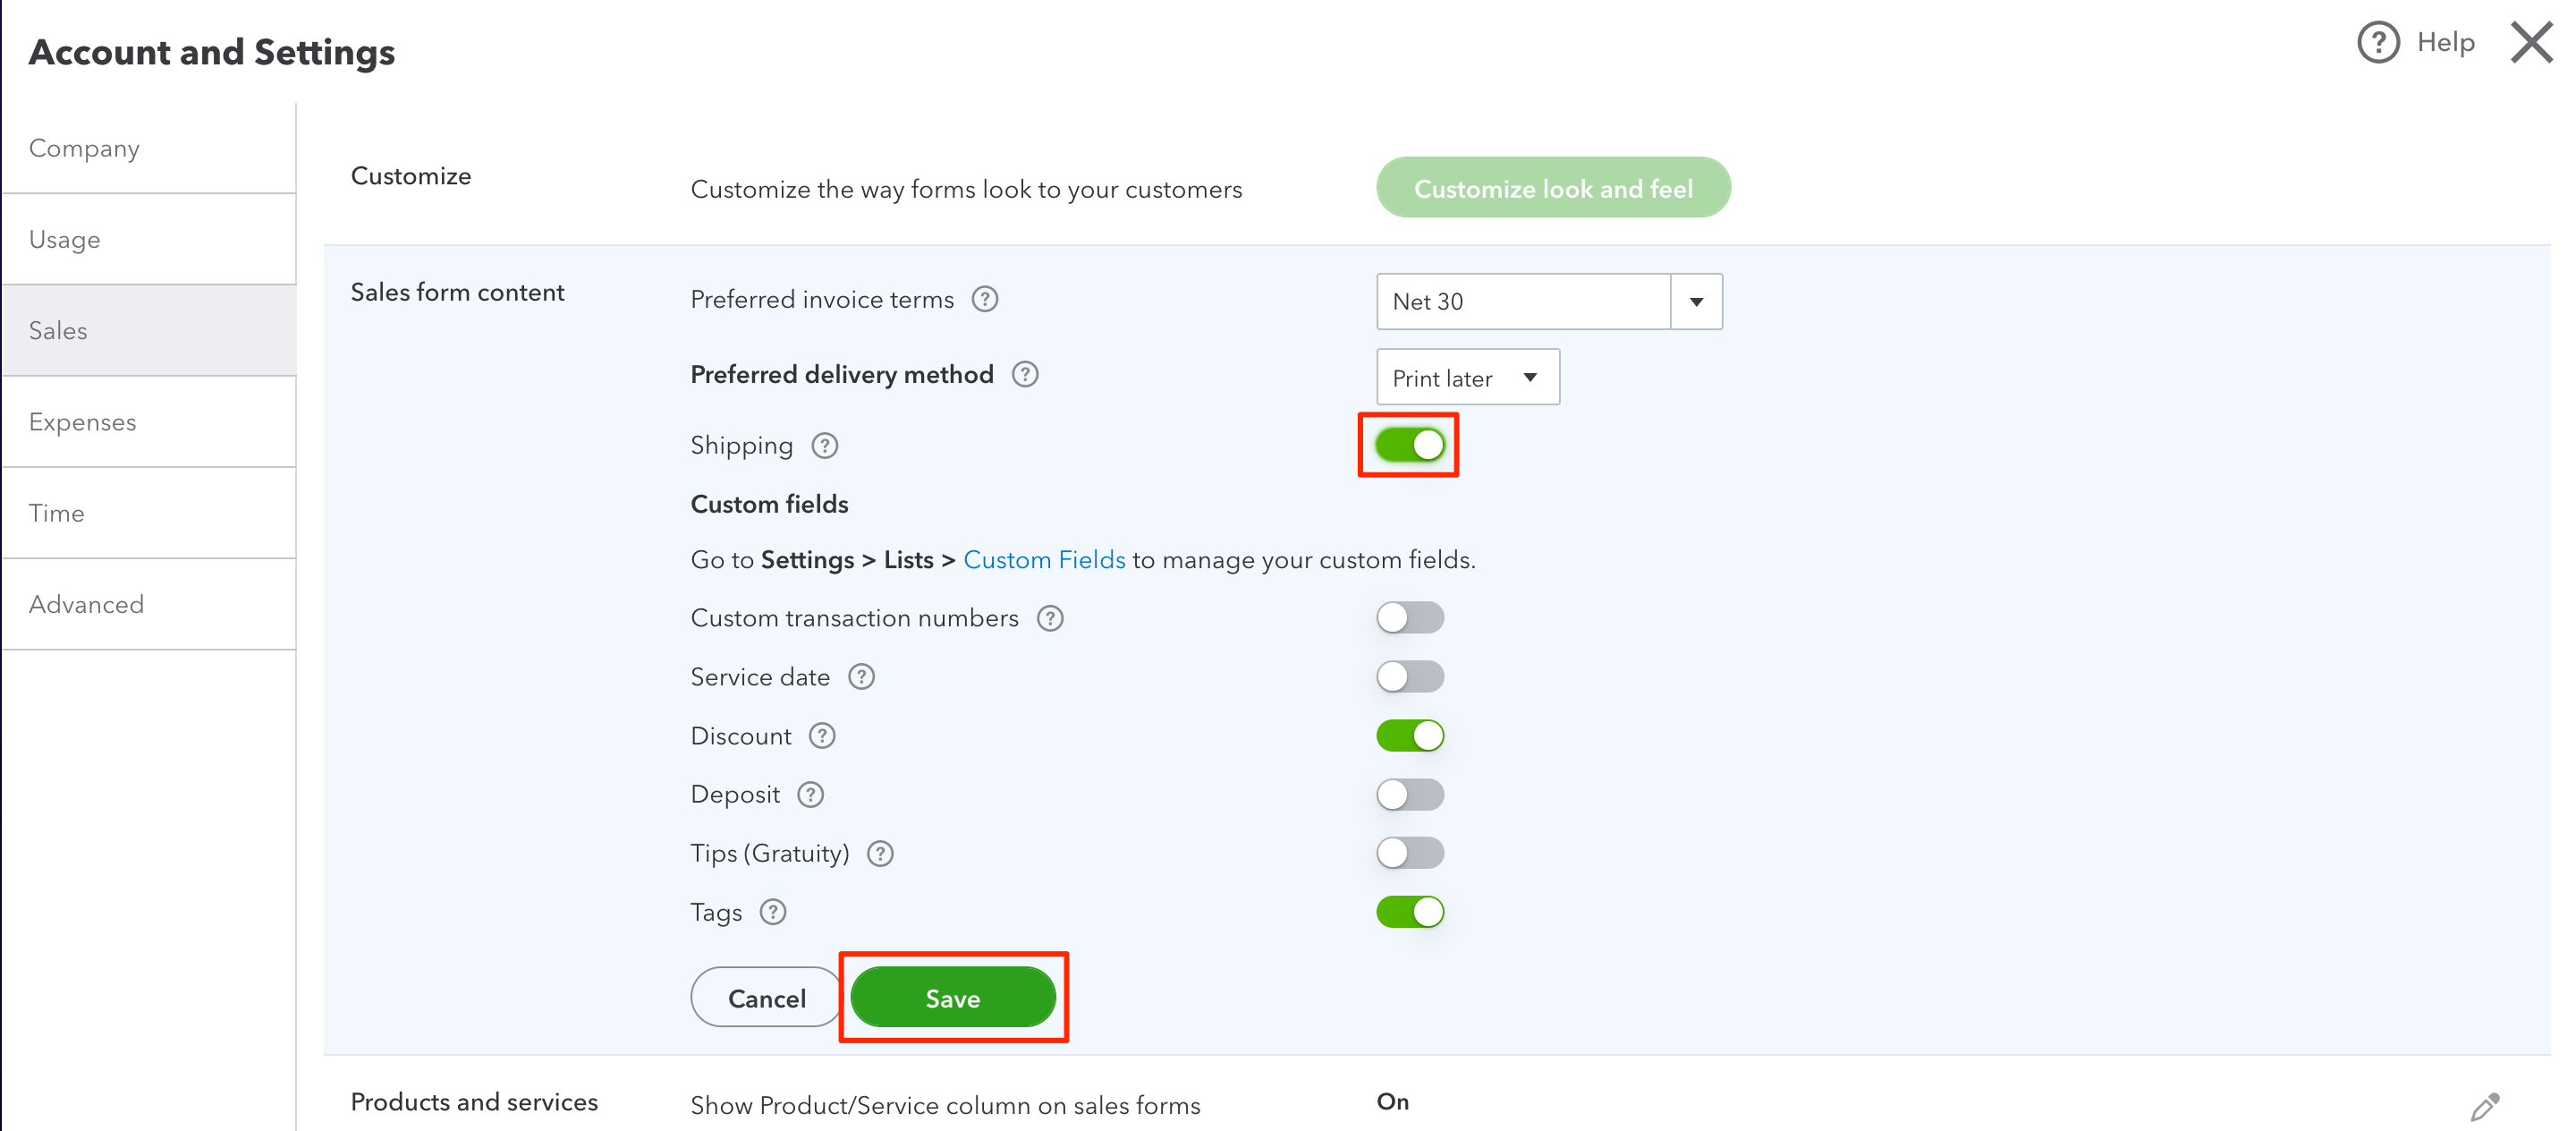
- Enable Shipping (toggle on/green), then click Save.
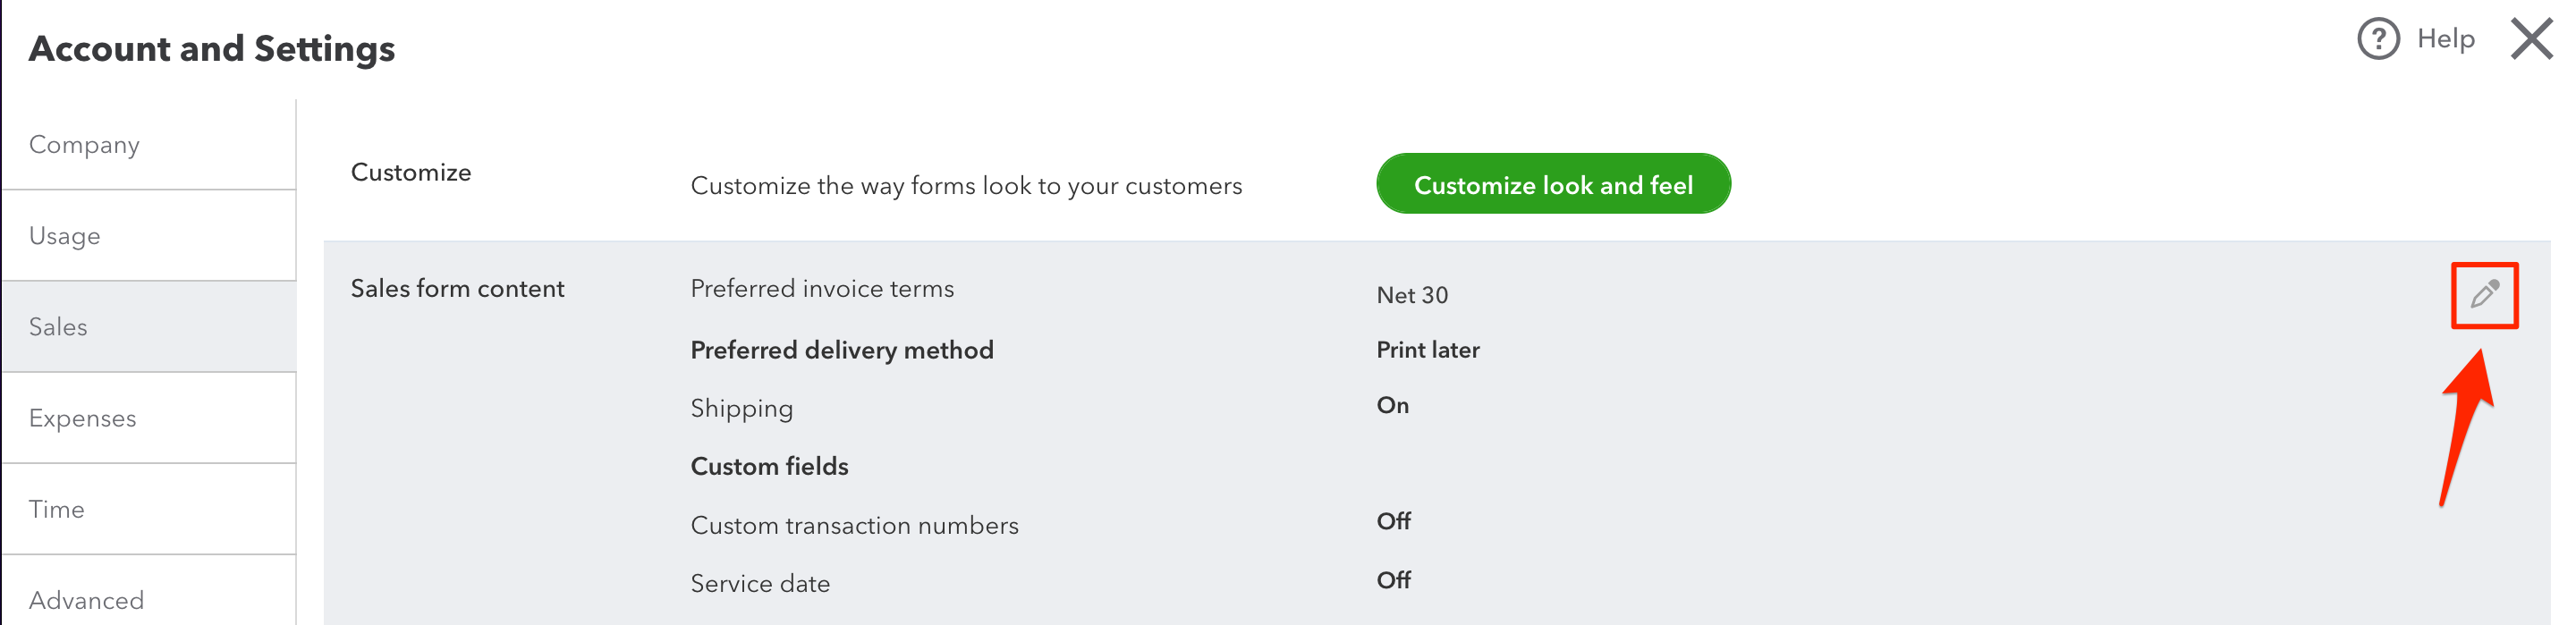
- In the Sales form content section, click the Edit pencil icon again.
- Under Custom Fields, click the Custom fields link.
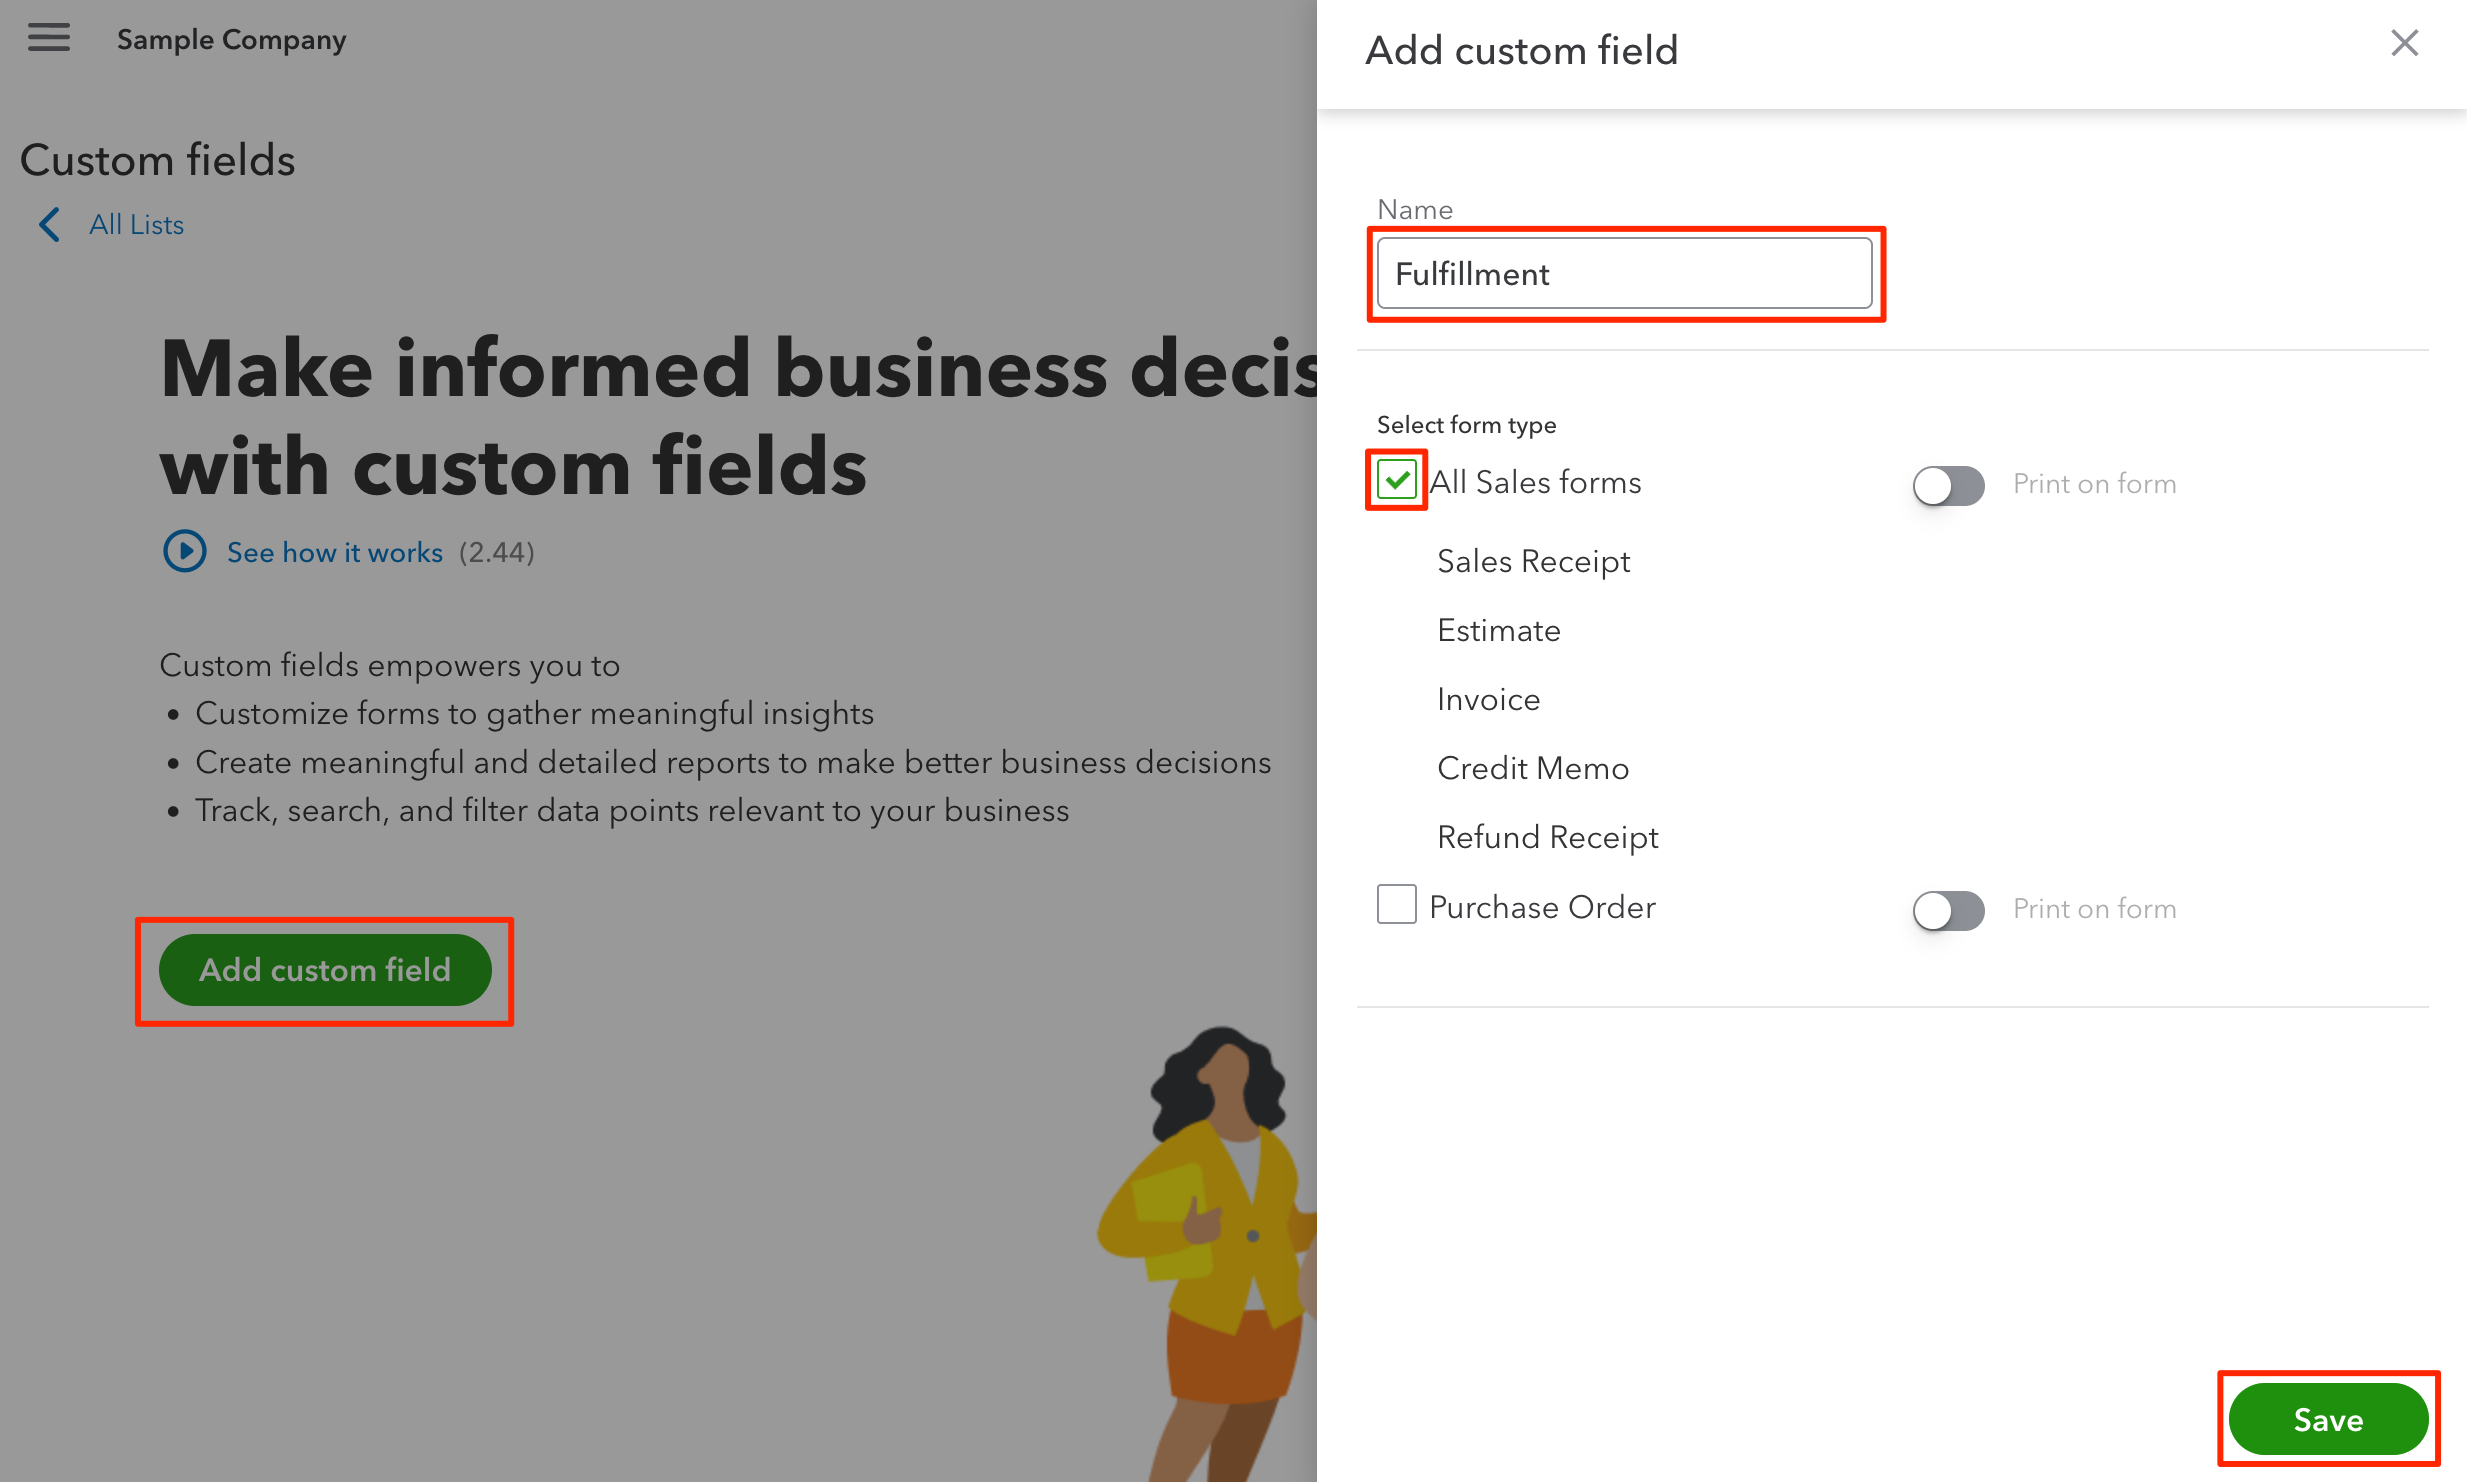
- In Custom Fields, click Add custom field (or Add field if you have other custom fields already).
- In Add Custom Field, for the field Name, enter
Fulfillment. - Check the box to apply this field to All sales forms.
Note: If you are using QuickBooks Online Advanced, make sure that the Fulfillments field is specifically applied to Invoices.
- Click Save.
When these steps are complete, the editable Fulfillment field will be available on your QuickBooks invoices.

Next: Gather API Credentials